In the age of social media, using PicsArt’s blur tools for privacy and anonymity is becoming increasingly important. Whether you want to protect your identity or simply add a touch of mystery to your photos, blurring your face can be a great way to achieve these goals.
In this tutorial, we will guide you through blurring your face using the popular photo editing app, Picsart. With just a few simple steps, you can easily blur your face and create stunning, professional-looking photos. So let’s dive in and learn how to blur face in Picsart!
Before we jump into the tutorial, let’s take a moment to understand the different blurring effects you can use in Picsart. Each effect offers a unique way to achieve the desired blur, so let’s explore them briefly:
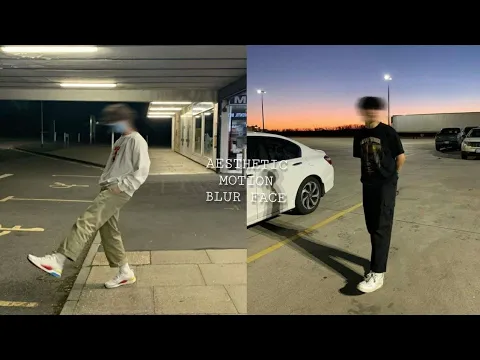
Motion blur: This effect creates the illusion of motion by adding streaks to moving objects in your photo. It’s perfect for simulating action or capturing dynamic scenes.
Radial blur: With this effect, you can create a focal point in your photo while blurring out the rest. It’s a great way to draw attention to a specific subject or create a shallow depth of field.
Tilt-shift blur: Similar to forced perspective photography, this effect makes objects in your photo appear miniature. You can use the blur tools to apply this effect. Using the blur tools to blur a picture in Picsart adds a trendy touch to your images and can be learned from the Picsart blog.
To begin blurring your face in Picsart, follow these simple steps:
Open the Picsart app on your device.
Tap on the “+” sign to create a new project.
Select the photo you want to edit from your device’s gallery.
After the photo you want to blur is uploaded, tap on it to open it in the editing interface.
Applying the Blur Face Effect
Now that your photo is open in Picsart, it’s time to apply the blur effect. Here’s how you can manually blur a face or picture with it:
Tap on the “Effects” icon at the bottom of the screen.
Scroll through the effects until you find the “Blur” category.
Select the specific blur effect you want to apply, such as “Motion Blur” or “Radial Blur.”
Adjust the intensity of the blur using the slider provided.
Once you are satisfied with the blur effect, tap on the checkmark icon to apply it to your photo.
Selecting and Isolating Your blur Face
Now that you’ve applied the blur face effect to your entire photo via Picsart, it’s time to isolate and blur just the face in your photo. Here’s how you can do it:
Tap on the “Tools” icon at the bottom of the screen.
Select the “Selection” tool from the options.
Use the available tools, such as “AI Select,” “Oval,” “Rectangle,” “Lasso,” or “Brush,” to select and isolate your face.
Once your face is selected, tap on the “Effects” icon again.
Scroll across the options to choose the blur effect you want to apply to your face.
Adjust the intensity of the blur as needed.
Tap on the checkmark icon to apply the blur effect to your face.
Fine-tuning and Saving Your Photo
After applying the blur effect to your face, fine-tune some aspects of the photo. For more detailed steps on how to use PicsArt’s blur tools, here are a few additional steps you can take from our Picsart blog:
Use the available editing tools, such as brightness, contrast, and saturation, to adjust the overall look of your photo.
Experiment with different filters and effects to enhance the mood and tone of your image.
Once you are satisfied with the final result of your blurred picture, tap on the checkmark icon to save your photo.
Choose the desired resolution and file format for your saved photo.
You can now share your blurred photo directly to your social media accounts or save it to your device’s gallery.
Advanced Tips and Tricks
Now that you know the basics of blurring your face in Picsart, here are a few advanced tips and tricks to take your editing skills to the next level:
Experiment with different blending modes in Picsart to achieve unique and trendy blur effects.
Combine multiple blur effects using PicsArt’s blur tools to create a custom look that suits your style.
Use the eraser tool to selectively remove the blur effect from certain areas, such as your eyes or mouth, for a more dramatic or artistic effect.
Explore other features and tools in Picsart, such as overlays, stickers, and text, to add additional elements to your photo and enhance its visual impact.
how to blur the face in PicsArt Now!
Blurring your face in photos can be a fun and effective way to protect your privacy or add an air of mystery to your images. With the powerful editing tools available in Picsart, you can erase or blur a picture easily, achieving professional-looking results even without prior editing experience. So go ahead and give it a try – use the blur tools to blur your face in Picsart and take your photos to the next level!
Remember, practice makes perfect, so check out the PicsArt blog to not be afraid to experiment and explore different techniques to find your unique editing style. Happy blurring!
Frequently Asked Questions (FAQS)
Blurring your face in photos can help protect your privacy or add a hint of mystery. In the age of social media, it’s a simple way to control what you share online.
Picsart offers various blurring effects, including Motion blur for action shots, Radial blur to focus on a subject, Tilt-shift blur for a miniature effect, and Bokeh blur for a dreamy background.
Open Picsart, tap the “+” sign, choose your photo, and tap on it to open it in the editing interface.
Tap on the “Effects” icon, find the “Blur” category, choose a specific blur effect, adjust the intensity, and tap the checkmark icon to apply it.
Yes! After applying the blur effect, use the “Selection” tool to isolate your face, tap on “Effects” again, choose a blur effect for your face, adjust the intensity, and apply.
Fine-tune your photo using brightness, contrast, and saturation adjustments. Experiment with filters, such as select blur, and when satisfied, save the blurry picture with your preferred resolution and file format.
Yes! Try different blending modes for creative effects, combine multiple blur effects, use the eraser tool to selectively remove blur, and explore other Picsart features like overlays, stickers, and text to add extra elements to your photo.
Absolutely! After saving your blurry photo, you can share it directly on your social media accounts or save it to your device’s gallery.
Yes, the tutorial is designed for simplicity. Just follow the step-by-step guide to achieve professional-looking blurred photos with ease.
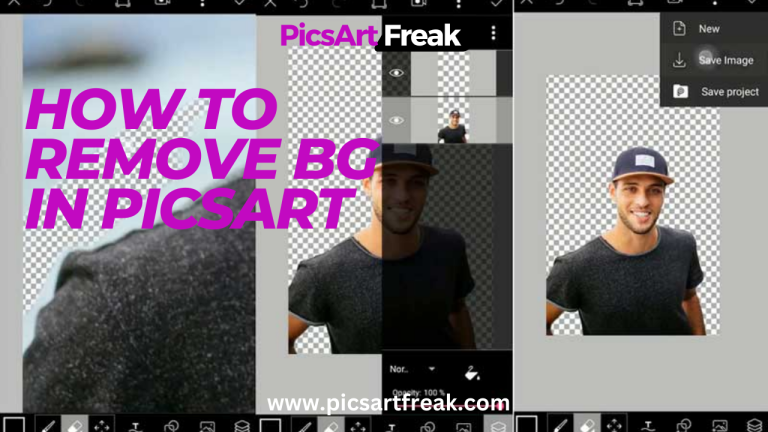
Are you an aspiring editor looking to enhance your photo editing skills? Removing the background from an image is a crucial technique that can take your editing game to the next level. Picsart, a popular photo editing software, offers powerful tools to help you remove backgrounds effortlessly. We’ll walk you through step-by-step instructions on how…
Keeping your photo editing skills fresh and on-trend can be quite challenging. With all the different edits on social media, it’s important to find unique ways to stand out from the virtual crowd, much like a creative Picsart creator does. One creative and easy way to spice up your feed is by using mirror images. While…
In today’s digital age, photo editing has become an essential skill. Whether you’re an aspiring photographer or just someone who loves capturing memories, being able to edit your photos can take your images to the next level. One popular photo editing app that has gained immense popularity is PicsArt. With its user-friendly interface and powerful…
PicsArt is a popular photo and video editing app that allows users to unleash their creativity and transform ordinary images into eye-catching visual content. While it is primarily designed for mobile devices, there is also a desktop version available for Windows 7 users. we will walk you through the step-by-step process of downloading PicsArt for…
Picsart is a popular photo and video editing tool that offers a wide range of features, including the ability to record and take screenshots of your edits. Whether you want to capture your editing process for tutorial purposes or simply save a particular moment, taking a screenshot in Picsart is a straightforward process. so, we…
In the vast realm of photography, the challenge that accompanies capturing the perfect moment is often dealing with an unsatisfactory background, thus understanding how to edit and change the background in Picsart is crucial. The complication of an unwanted distraction or a mismatched setting demonstrates how a substandard background can take away from the subject’s…


One Comment
Comments are closed.